Arterial Line Placement
Indications
Approximately eight million arterial lines are placed in the United States yearly (1). The main indication for arterial line placement is the need for close hemodynamic monitoring. The second-to-second blood pressure variations seen with an arterial line allow providers to titrate medications according to a patient’s hemodynamic needs. From vasopressor support to anti-hypertensive drips, arterial lines allow for instant feedback on a patient’s hemodynamics. In cardiac arrest settings, arterial lines can be used to assess for the presence of a pulse and can help guide resuscitation. The radial artery is the most common location for arterial line placement because it is readily accessible and has a low complication rate (1). The femoral artery is also a common insertion site and is often the vessel of choice for severely hypotensive or coding patients because of its larger caliber. This post details each of these procedures.
Radial Arterial Line Placement
Preparation
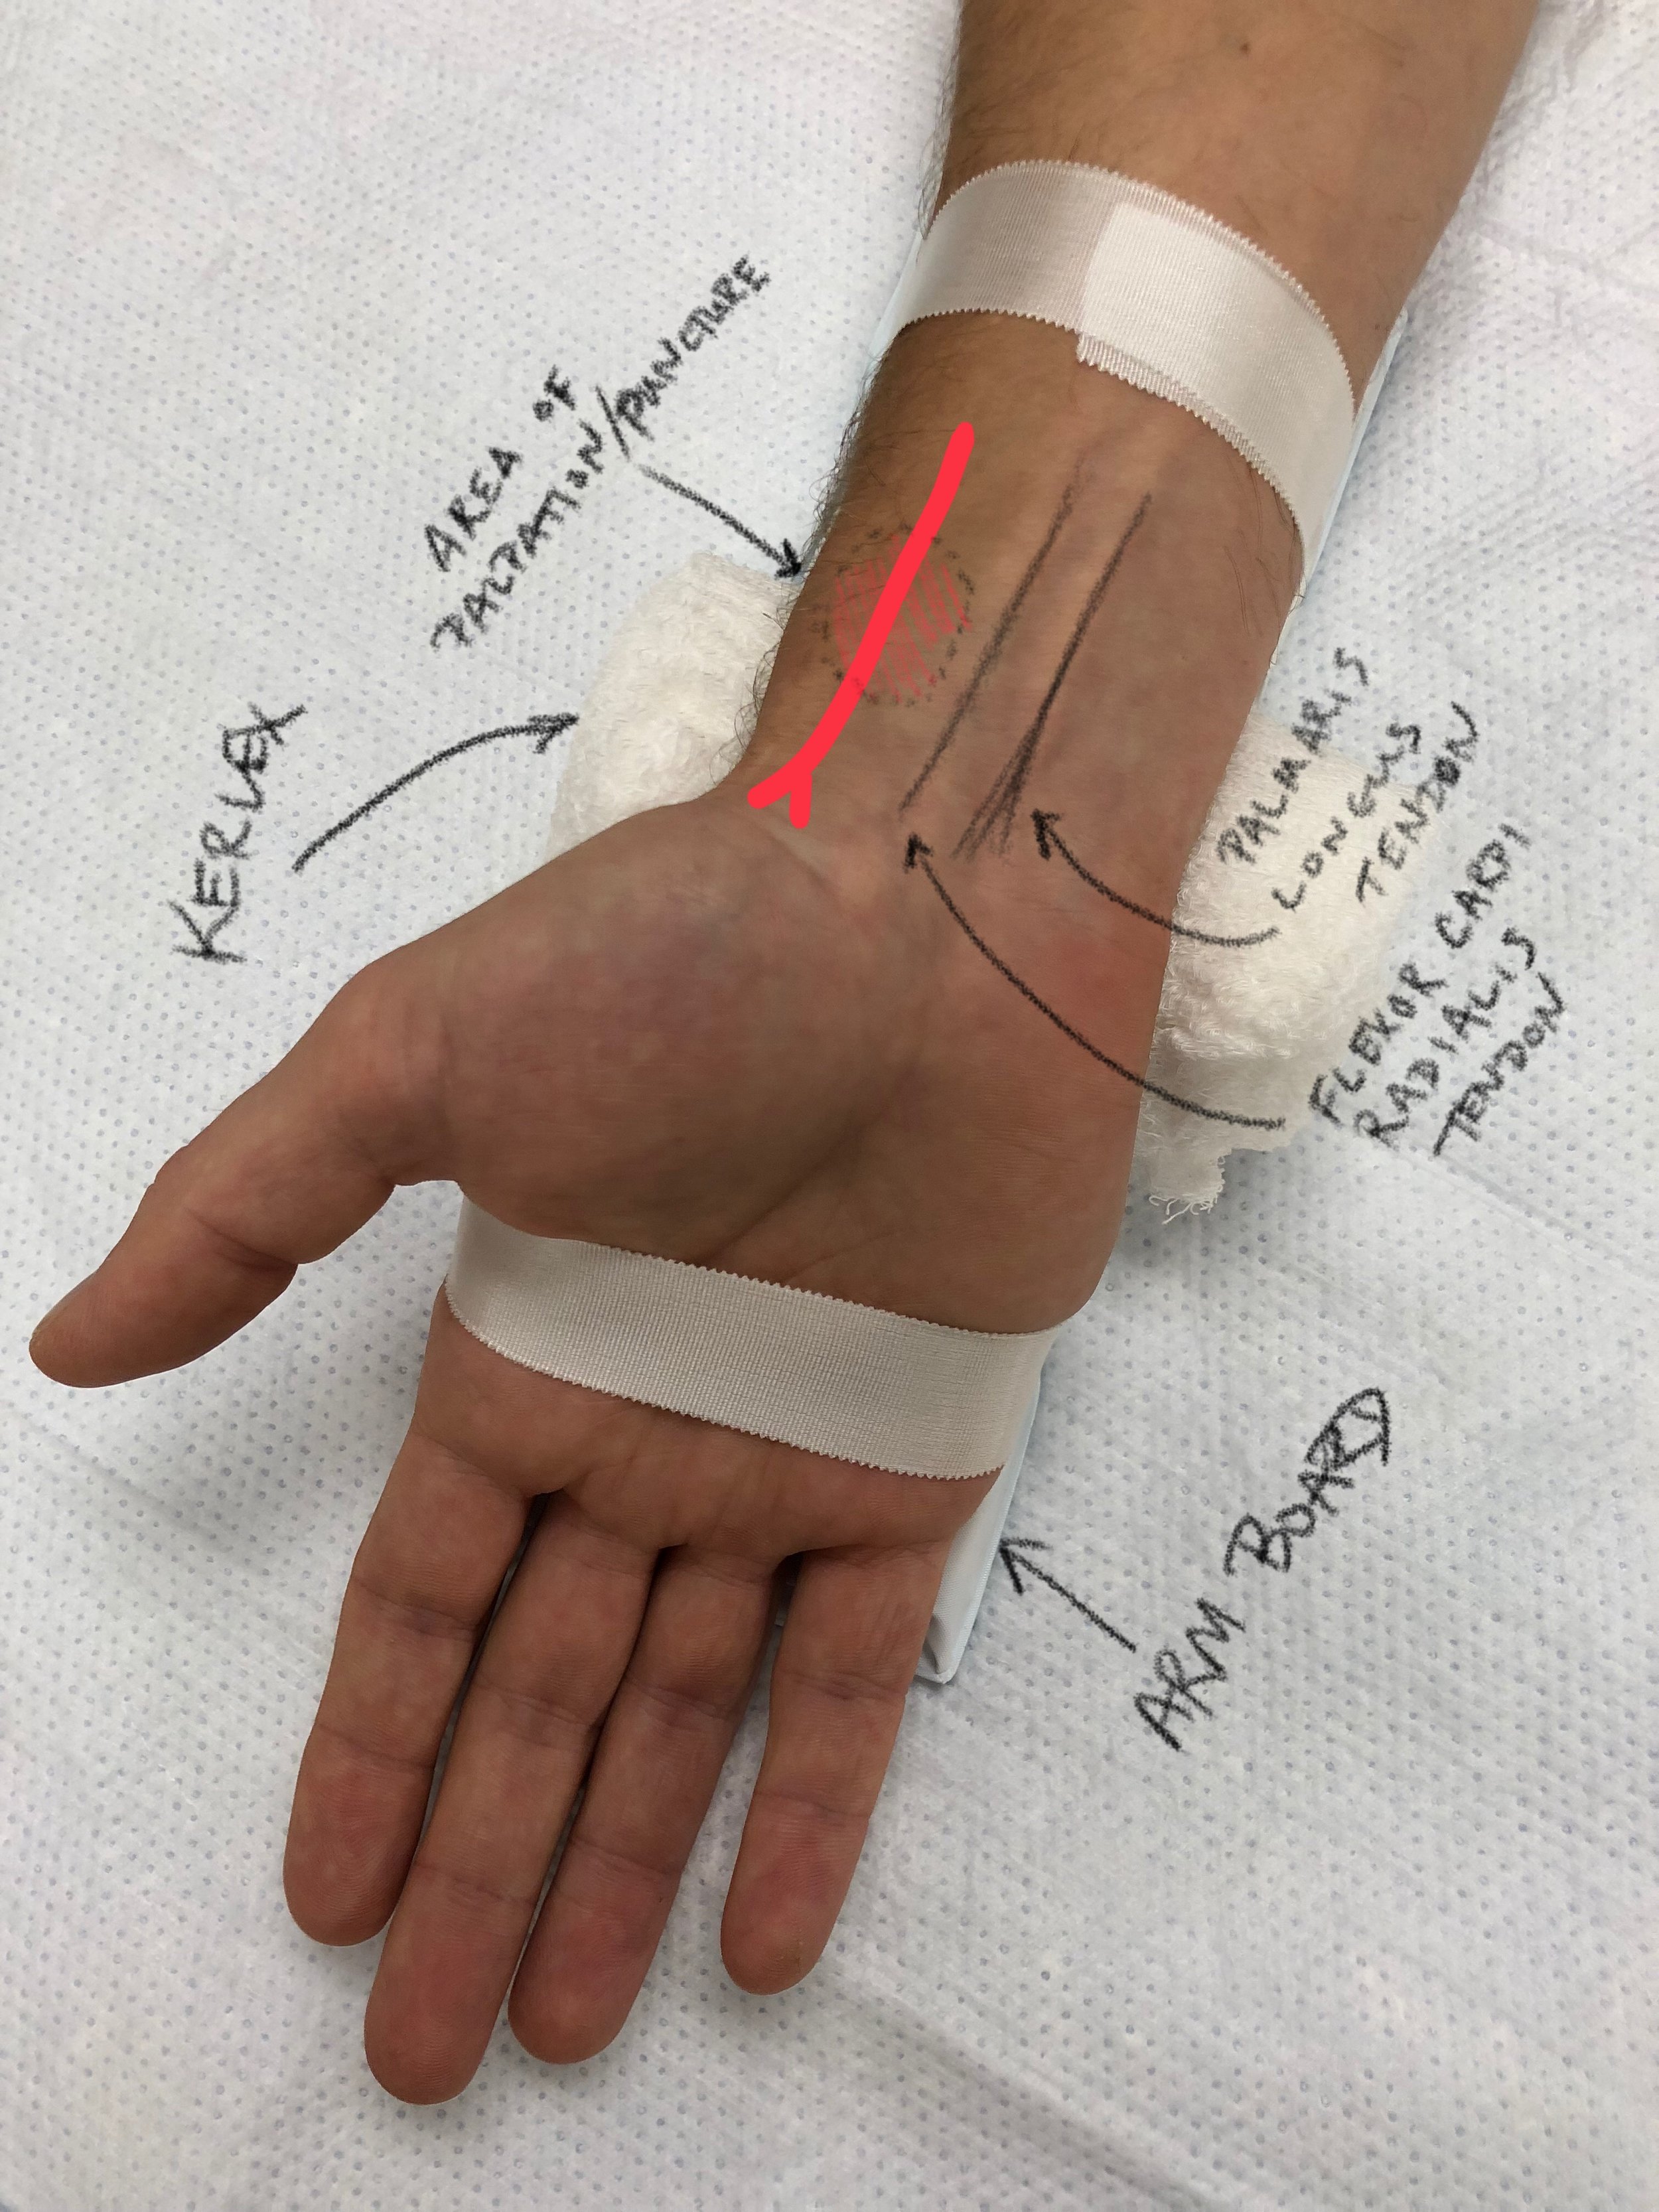
Figure 1: Set Up and Anatomy for Radial Arterial Line Placement - Short Arm Board, Kerlex, and Tape are used to Secure the Patients wrist during and following the procedure.
Assess the external anatomy of the selected insertion site. If using ultrasound, evaluate the site using ultrasound prior to starting procedure.
Perform the Allen Test to assess for patients at higher risk of ischemic complications from prolonged arterial cannulation
Occlude both the radial and ulnar arteries
Have the patient tightly clench their fist to exsanguinate the hand
Have the patient open their hand
Release pressure from the radial artery
You should note a rapid return of rubor to the patient's hand
If return of color > 5-10 seconds, radial arterial cannulation should NOT be performed (2)
Dorsiflex the patients wrist to approximately 60 degrees over a small towel roll or Kerlex gauze roll and fix the wrist to a short arm board using tape (See Figure 1)
Utilize Required PPE- wash hands, wear cap, mask, sterile gown, and sterile gloves. Use sterile probe cover for the ultrasound.
Clean the insertion site with chlorhexidine.
Create a sterile field by draping sterile towels around the insertion site.
Maintain sterile field throughout the procedure.
Prepare equipment by ensuring that transducer set-up is primed and readily available.
For reference, this video contains the necessary information about how to set up and zero an arterial line set up (though in the context of compartment pressure measurement)
Option #1 - "Blind" Radial Arterial Line Placement
Palpate the radial artery with the non-dominant hand to identify its location and trajectory.
Insert the needle at approximately at 30 degree angle to the skin surface, in line with the vessel’s path with the dominant hand. Make small adjustments based on tactile feedback.
Successfully cannulate the vessel.
At this point you should see free return of pulsatile blood.
Insert guidewire through the needle to a depth of approximately 10 cm.
Remove needle while maintaining control of the guidewire.
Make small skin incision adjacent to the guidewire.
Advance catheter over the guidewire and into skin while maintaining control of the guidewire.
Remove the guidewire and cover catheter with fingertip.
Connect arterial line transducer.
Suture the line in place.
Option #2 - Ultrasound Guided Radial Arterial Line with a "Dart"*
The radial "dart" is a vascular access device with a 20 G angiocath with a preloaded wire held within a plastic tube. Advancing the black tab towards the catheter will advance the wire through the needle and into the artery.
Insert the needle over the vessel and follow the needle tip into the artery using ultrasound guidance. (Needle visualization is a critical micro skill in the performance of any ultrasound-guided procedure. Please watch this video from Dr. Stolz on how to improve your needle visualization.)
Successfully cannulate the vessel. Should see free return of pulsatile blood within the chamber of the dart.
Slide the black tab on the catheter toward the needle. This advances the wire into the vessel.
Stablize the needle
Advance the catheter over the wire and into the vessel.
Remove the dart device, leaving the catheter in the vessel. Be sure to keep the distal end of the catheter covered until the transducer is connected so that air does not enter the arterial circulation.
Connect arterial line transducer.
Suture the line in place.
*For patients with diminished pulses, use of ultrasound has been shown to increase first pass success rate and decrease the number of punctures needed for successful cannulation (3). Ultrasound guidance can also be used with the needle and separate wire set up shown in Option #1 above.
Femoral Arterial Line
Preparation
Assess the external anatomy of the selected insertion site and evaluate it using ultrasound prior to starting procedure.
Please note that pulsatility of the vessel will be minimal or absent if evaluating intra-arrest or peri-code.
The artery will also be very compressible if blood pressure is low or absent.
Identify necessary PPE- wash hands, wear cap, mask, sterile gown, and sterile gloves. Use sterile probe cover for the ultrasound.
Consider double glove if placing intra-arrest arterial line.
Clean the insertion site with chlorhexidine.
Place a full drape on the patient.
Maintain sterile field throughout the procedure and ensure extra care with needles if placing intra-arrest line.
Prepare equipment by ensuring that transducer set-up is primed and readily available.
Inject a small amount of sterile saline into the tray. This will be used in the syringe during needle advancement.
Catheter Insertion
Using ultrasound, identify the needle insertion site that will allow cannulation of the desired vessel.
Anesthetize the area over the insertion site (if indicated in clinical setting).
Aspirate 1-2ccs of sterile saline into the syringe that will be used for procedure.
Connect needle to the syringe with saline.
Insert and advance the needle while continuously aspirating.
Follow the needle tip into the vessel using ultrasound guidance, being extremely cautious not to backwall the vessel at any point.
Only move one item at a time, the needle or the ultrasound, but not both.
Of note, long axis is more accurate.
Successfully cannulate the vessel.
In the appropriate clinical setting, should obtain free return of bright red, pulsatile blood once the vessel is cannulated. This will not be the case if line is placed intra-arrest.
Drop the angle of finder needle until almost parallel to skin.
Stabilize the needle while disconnecting the syringe.
Insert guidewire through the needle to a depth of approximately 15 cm.
Remove needle while maintaining control of the guidewire.
Confirm guidewire is in the vessel using ultrasound.
Make small skin incision adjacent to the guidewire.
Advance catheter over the guidewire and into skin with a twisting motion while maintaining control of the guidewire.
Ensure the guidewire moves freely within the catheter.
Remove the guidewire from the catheter and immediately cover the distal tip of the catheter to prevent air from entering the arterial circulation.
Immediately connect arterial line transducer.
Ensure arterial waveform visualized on monitor.
Securing the Line
Suture the line in place.
Tips:
Consider taping transducer tubing to thigh to help hold line in place.
Take a generous bite through skin just underneath the distal portion of the catheter.
Tie over top of the catheter and cut suture.
Consider placing a second suture right where the transducer tubing begins (can help prevent dislodgement of catheter).
Add biopatch and place a sterile dressing.
References
Scheer BV, Perel A, Pfeiffer UJ. Clinical review: Complications and risk factors of peripheral arterial catheters used for haemodynamic monitoring in anesthesia and intensive care medicine. Critical Care. 2002;6(3):199-204.
Milzman, D. and Janchar, T. Arterial Puncture and Cannulation. Chapter 20 Roberts and Hedges. pp 349-363.
White L, Halpin A, Turner M, Wallace L. Ultrasound-guided radial artery cannulation in adult and paediatric populations: a systematic review and meta-analysis. British Journal of Anaesthesia 2016;116(5):610–7.
Sobolev M, Slovut DP, Lee Chang A, Shiloh AL, Eisen LA. Ultrasound-guided catheterization of the femoral artery: A systematic review and meta-analysis of randomized controlled trials. J Invasive Cardiol. 2015 Jul; 27(7): 318-23.
Comments, Suggestions, Feedback? Send us a Message!